

 In this blog post, we’ll discuss upgrading MySQL with Orchestrator.
I recently had a client, Life360, that wanted to upgrade from Percona Server 5.5 to Percona Server 5.6, and implement GTID in their high transaction environment. They had co-masters and multiple read slaves.
Orchestrator made this job much easier for us. My colleague, Tibi, recently posted about Orchestrator here and here.
Daniel from Life360 saw Orchestrator and was very interested. So here is how he setup Orchestrator in his own words:
I did some initial testing with the vagrant boxes provided in the Orchestrator repo, to see how to configure the agents and get the Orchestrator server to do what we want.
I then moved to install the Orchestrator server, Orchestrator backend on RDS, and deploy the clients on the slaves and masters in our Amazon VPC MySQL instances.
Once the server setup was done, the clients were auto-detected through CNAME discovery of the masters, and the agents talked to the server (it took a while as CNAMES wasn’t working as expected, but that’s fixed in the new server version).
We were pretty amazed at the number of actions you can do through orchestrator itself, such as: moving slaves to a different master through drag and drop, enabling GTID on a node with the push of a button, setting up GTID based failover, taking LVM snapshots using Orchestrator Agent, etc.
We went ahead and tested the master change on drag and drop, and after a few successful attempts, we even brought it back to where it was initially. After those tests, we were pretty confident that we could leverage Orchestrator as one of our main tools to assist in the coming upgrade.
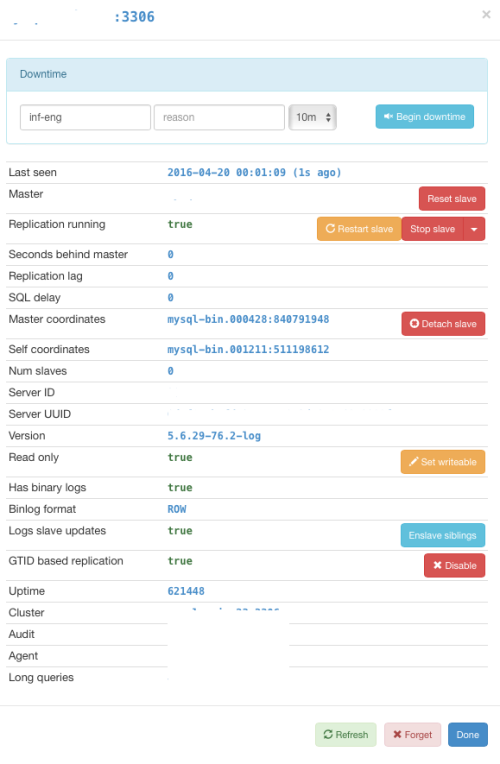
Here is a screenshot of the initial setup:

Manjot: Once Daniel had Orchestrator setup, he wanted to leverage it to help with the MySQL upgrade. We set out to create a plan that worked within his constraints and still kept best practices in mind.
First, we installed Percona Server 5.6 fresh on our dedicated backup slave. That first 5.6 slave was created with MyDumper to achieve forward compatibility and not have any legacy tablespaces. Since MyDumper was already installed with the Percona Backup Service that Life360 has, this was fairly easy to accomplish.
The MyDumper slave rebuild works in the following way:
To take a mydumper backup:
- Go to your desired backups directory
- Install mydumper (sudo apt-get install mydumper)
- mydumper -t 8 -L mydumper.log –compress
To restore:
- Make sure MyDumper is installed: sudo apt-get install mydumper
- Copy the MyDumper backups over to a backups dir
- Export your BACKUP_DIR as env var
- Run this to restore with MyLoader (from https://gist.github.com/Dnile/4658b338d4a101cbe2eeb5080ebddf8e):123456789#!/usr/bin/env shcd $BACKUP_DIRexport DESTHOST=127.0.0.1export BACKUP_DIR=/vol_mysql/backupsmysqld --skip-grant-tables &for i in `ls -1 *-schema.dump.gz | cut -d'-' -f1`; do mysql -h $DESTHOST -e "CREATE DATABASE IF NOT EXISTS $i"; zcat $i-schema.dump.gz | mysql -h $DESTHOST $i; zcat $i-schema-post.dump.gz | mysql -h $DESTHOST $i; done/usr/bin/myloader --host=$DESTHOST --directory=$BACKUP_DIR --enable-binlog --threads=10 --queries-per-transaction=20 -v 3chown -R mysql:mysql /var/lib/mysql/
Once the first 5.6 slave was caught up, we used Xtrabackup to backup 5.6 and then restored to each slave, cycling them out of the read slave pool one at a time.
Once all the slaves were upgraded, we created a new 5.6 master and had it replicate off our primary 5.5 master.
Then we moved all of the slaves to replicate off the new 5.6 master.
Life360 had long cron jobs that ran on the second 5.5 master. We moved the cron applications to write to the primary 5.5 master, and locked all tables. We then stopped replication on the second co-master. Daniel stopped MySQL and decommissioned it.
We then moved all application writes to the new 5.6 master. While Orchestrator can use external scripts to move IPs, we used a manual process here to change application DSNs and HAProxy configuration.
On the 5.5 master that remained, we used Orchestrator to set it to read only.

Daniel says this didn’t do a whole lot to get rid of connections that were still open on this server.
On the new master, we used the stop slave and reset slave buttons in the Orchestrator panel so it would no longer slave from the old master.
Once some of the thousands of connections had moved to the new master, we stopped MySQL on the 5.5 master, which took care of the rest and the application “gracefully” reconnected to the new 5.6 master.
There was some write downtime, as some connections did not drop off until they were forced to because php-fpm refused to let go. There is also always a high volume of transactions in this environment.
At this point our topology looks like this (ignore the globe icons for now):

But as always Daniel wanted MOAR. It was time for GTID. While we could have done this during the upgrade, Life360 wanted to manage risk and not make too many production changes at one time.
We followed Percona’s guide, Online GTID Deployment, but used Orchestrator to shuffle the old and new masters and toggle read_only on and off. This made our job a lot easier and faster, and saved us from any downtime.
The globes in the topology screenshot above show that the slaves are now using GTID replication.
Orchestrator makes upgrades and changes much easier than before, just use caution and understand what it is doing in the background.


Great illustration of Orchestrator in action, thank you.